Getting Started: Installation
This page walks you through downloading RunScore and installing it on every computer you'll use on race day — your main scoring machine and any additional client computers for registration, announcing, or results display.
Before you install
Check these on every race-day computer first:
- Windows 10 or later — RunScore Server (RSServer) and Client (RSClient) are Windows desktop programs.
- Use IPv4 — RunScore connects over TCP/IP but does not support IPv6. If your network assigns IPv6 addresses, use IPv4 for the race network.
- Prefer a wired network — if you time over Wi-Fi and see dropouts, switch from the 5 GHz band to 2.4 GHz for better range across a start/finish area.
- Keep the race folder on the local
C:drive, not a network share — real-time timing needs fast, reliable disk access, and a network drive can cause data errors under load. See Race Folder Basics.
Step 1 — Download the installation files
Visit the RunScore Home Page and look for the Downloads link on the right side of the page. You'll find two files to download:
| File | Purpose |
|---|---|
| RunscoreSetup.exe | Installs the full RunScore Server on your main scoring computer |
| RSClientSetup.exe | Installs a lightweight client on every other computer |
Download both files to an easy-to-find location on your computer (your Desktop or Downloads folder works great).
Every computer in your setup gets one of these two installers — never both. Your main computer gets RunscoreSetup.exe; all other machines get RSClientSetup.exe.
Step 2 — Install on your main (server) computer
Your main computer is the one that will run the scoring calculations and store all the race data. It gets the full RunscoreSetup.exe installer.
Double-click RunScoreSetup.exe to launch the installer, then follow these four screens:
Screen 1 — Select installation location
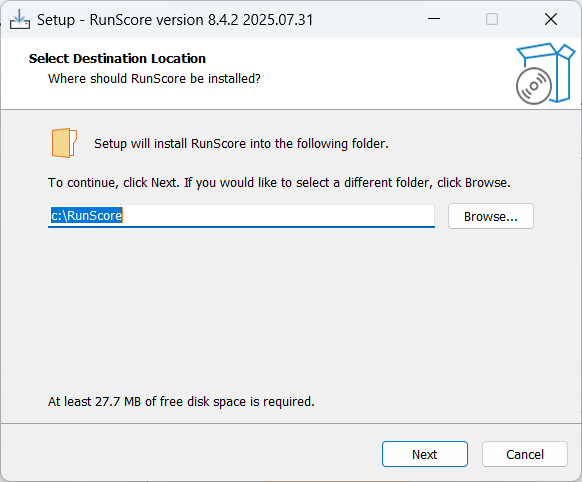
This screen lets you choose the folder where RunScore will be installed. We strongly recommend leaving the default location (C:\RunScore) as is — other parts of RunScore (like sample files and documentation) are built around this path. If you need to change it, you can, but keep a note of where you put it.
Click Next to continue. A Cancel button is always available on every screen if you need to stop.
Screen 2 — Choose components to install
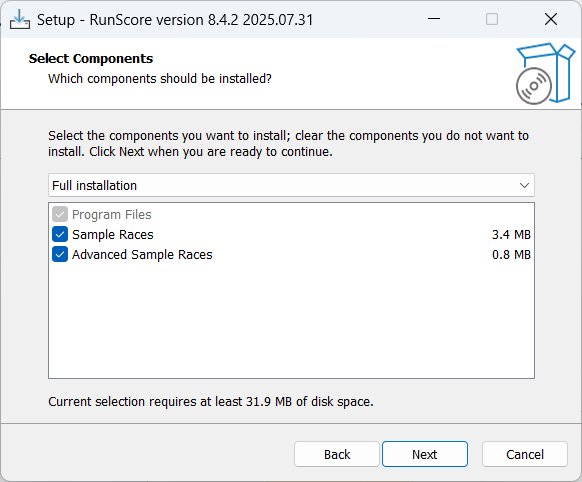
A dropdown menu offers three options:
| Option | What gets installed |
|---|---|
| Full Installation | Program files + Sample Races folder + Advanced Sample Races folder |
| Compact Installation | Program files only |
| Custom Installation | Program files + any combination of the other components you choose |
Full Installation is recommended for first-time users. The sample races are a great learning tool and won't take much disk space.
Click Next. From this screen onward, a Back button also appears so you can revisit any earlier choice.
Screen 3 — Additional tasks
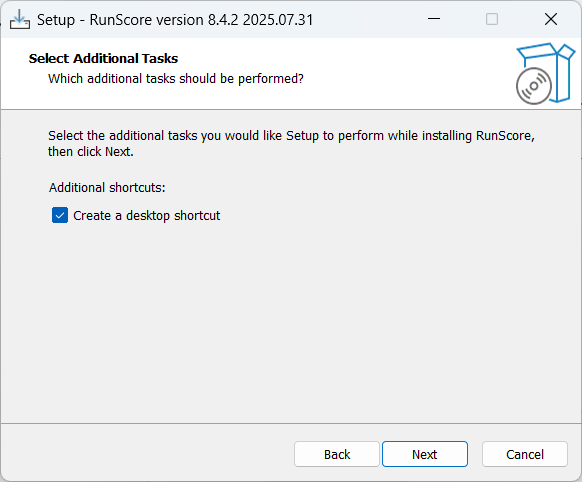
Here you can choose whether to create a desktop shortcut for RunScore. This is optional — you can always find the program in your Start menu — but a shortcut makes launching it a bit quicker on race day.
Make your choice and click Next.
Screen 4 — Ready to install
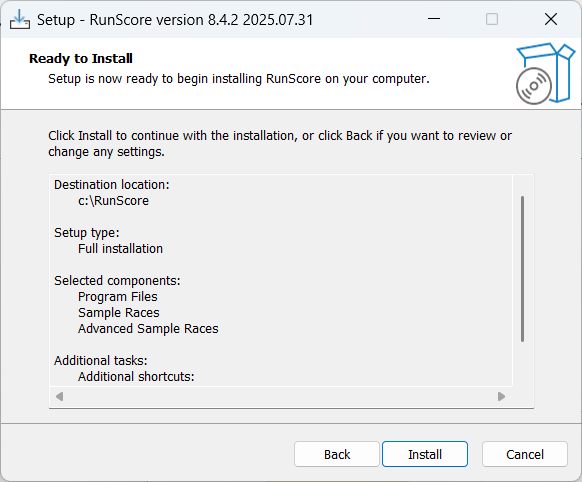
This summary screen shows everything you've chosen:
- Installation location
- Installation type (Full, Compact, or Custom)
- Whether a desktop shortcut will be created
Take a moment to review these details. If anything looks wrong, click Back to fix it. When everything looks good, click Install to begin.
The installer will complete in under a minute on most systems.
Step 3 — Install on client computers
Any other computer that needs to connect to your RunScore server — such as a computer for an announcer, a registration desk, or a results display screen — gets the lighter RSClientSetup.exe installer instead.
Client machines only need the RunScore user interface, not the full scoring engine. The RSClientSetup.exe file is smaller and won't set up a server on that machine — it simply gives that computer a way to connect to your main scoring computer over your local network.
The RSClient installation follows the same steps as the server installer above, but with fewer choices. Accept the defaults and click through to finish.
After installing RSClient, you'll need to point it at the server's IP address and port. See Client/Server Architecture for how the connection works, and Connection Troubleshooting if it won't connect.
You're installed — what's next?
With RunScore installed, your next step is to launch the program for the first time and get familiar with the interface.
Head to Launching RunScore to open the program and learn where your files live.