Security
RunScore's client/server security is opt-in. By default, anyone who knows the server's IP address and port can connect with no login. The features below add increasing levels of access control.
If your client machines are in a controlled environment (e.g. your own equipment at a race), you may not need authentication. Add a Clients table when untrusted users may connect, or when different operators need different levels of access.
Default: no authentication
With no security configured, RSClient connects without a login prompt, using the built-in Default role — full access to every module (view, edit, create, delete) and both initialization flags on. Default is RunScore's only true built-in role; every other role name is something an admin created. The thin-client restrictions still apply regardless — clients can't delete files, sort results, edit entries.ini, etc. — but any authenticated user can reach the server.
Clients table (login accounts)
To require a login, create a Clients table on the server: Misc → Edit Clients Table.
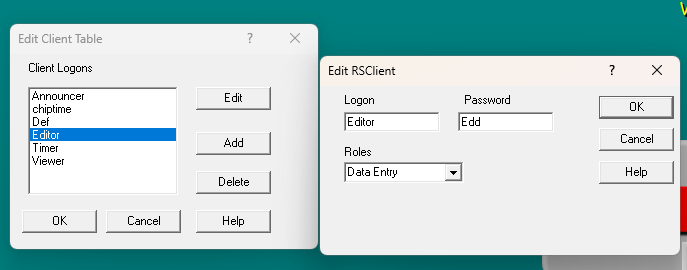
| Field | Description |
|---|---|
| Login | The username the client enters at connection time |
| Password | Optional. If left blank, the client can log in without a password. |
| Role | Which role (permission set) this account uses — see Roles table below |
Storage details
Clients are stored in RSClients.xml (not a database table). RunScore looks in the race folder first, then falls back to the RunScore home directory.
Roles table (permission sets)
Roles define what a logged-in client can do. Configure them on the server: Misc → Edit Roles Table.
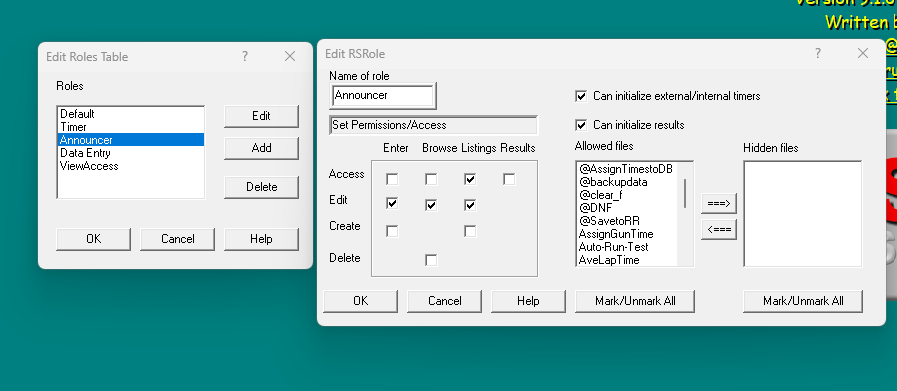
Permission matrix
Each role controls access per module:
| Module | Access | Edit | Create | Delete |
|---|---|---|---|---|
| Enter | View the Enter/Edit Names screen | Modify existing records | Add new records | — |
| Browse | View the Browse database screen | Modify records inline | — | Delete records |
| Results | View the Enter/Edit Results screen | Modify results | Add new results | — |
| Listings | View the Listings screen | Edit listing files | Create listing files | — |
Additional flags:
| Flag | Effect |
|---|---|
| Can initialize external/internal timers | External Timer, Push Button, and Start Internal Timer stay available |
| Can initialize results | Initialize → Results stays available |
Allowed / Hidden files
The role editor also controls which listing files appear on the client's Listings screen:
- Allowed Files — visible and runnable by the client.
- Hidden Files — not shown to the client at all.
Use Mark All / Unmark All to move the entire list, then selectively move back the few you want to allow (or hide).
How roles are enforced
After login, the server sends the role to RSClient. RSClient then controls what the user can do based on that role.
For example, the Browse screen checks the role's Browse Delete permission before it enables the Delete button. If the role says no, the button is grayed out — not just hidden.
Example role setups
RunScore auto-creates one role, Default, with full access — everything else is free text. Create as many roles as you need, and name them whatever makes sense for your race staff. The examples below show typical permission combinations.
Full access ("Administrator")

Full access: can view, edit, create, and delete in every module. All listing files are allowed.
Most access, restricted listings ("Timer")
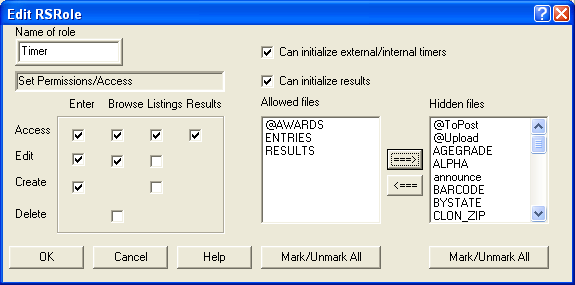
Can do most things an Administrator can, except:
- Cannot edit or create listing files
- Cannot delete entries from Browse
View-only ("Announcer")
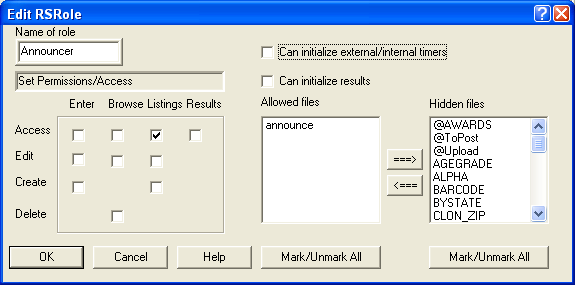
Highly restricted. The Announcer can only view the Listings screen, and only the listing files explicitly placed in the Allowed Files list are visible (typically just the announce file).
Login screen
When a Clients table exists, RSClient shows a login prompt at connection time:
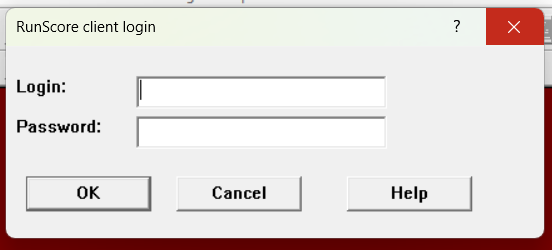
The /login= command-line flag can pre-fill the login name. It skips the dialog entirely only if the account has no password.
See also
- Architecture Overview — thin-client restrictions that apply regardless of roles
- Connection Troubleshooting — diagnosing network problems
- Preferences — Server TCP port configuration