Opening a Race and Viewing Data
With the RunScore workspace familiar and a race folder structure in mind, it's time to open an actual race file. In this section you'll open one of the included sample races, then explore the three main ways to view your race data: the Enter/Edit Name screen, the Browse screen, and the Listings screen.
Opening your first race file
RunScore ships with several pre-configured sample races that are perfect for learning. Let's open the 5K sample to bring the workspace to life.
- From the menu bar at the top of the RunScore window, click File.
- In the dropdown menu, select Open Race.
- Navigate to the sample race file at:
C:\RunScore\SampleRaces\5k\ENTRIES.FRM- Click through the folders:
C:\→RunScore→SampleRaces→5k→ selectENTRIES.FRM
- Click through the folders:
- Click Open.
As soon as the race opens, two things happen:
- The top border of the window updates to display the race name, date, and location
- Most of the previously grayed-out icons and Master Menu buttons become active
The workspace is now ready for you to work with. Feel free to explore — you can't break anything in a sample race.
Beyond the 5K, RunScore ships with 5K10K, 5K10KHalf, and 5K10KHalfFull templates covering common multi-distance race formats. Browse or download the full, up-to-date set from the race-templates repository.
Viewing participant data
RunScore gives you two primary screens for viewing participant records.
The Enter/Edit Name screen
The Enter/Edit Name screen is designed for viewing and editing individual records one at a time. Use it when you need to look up, add, or modify a single participant's details.
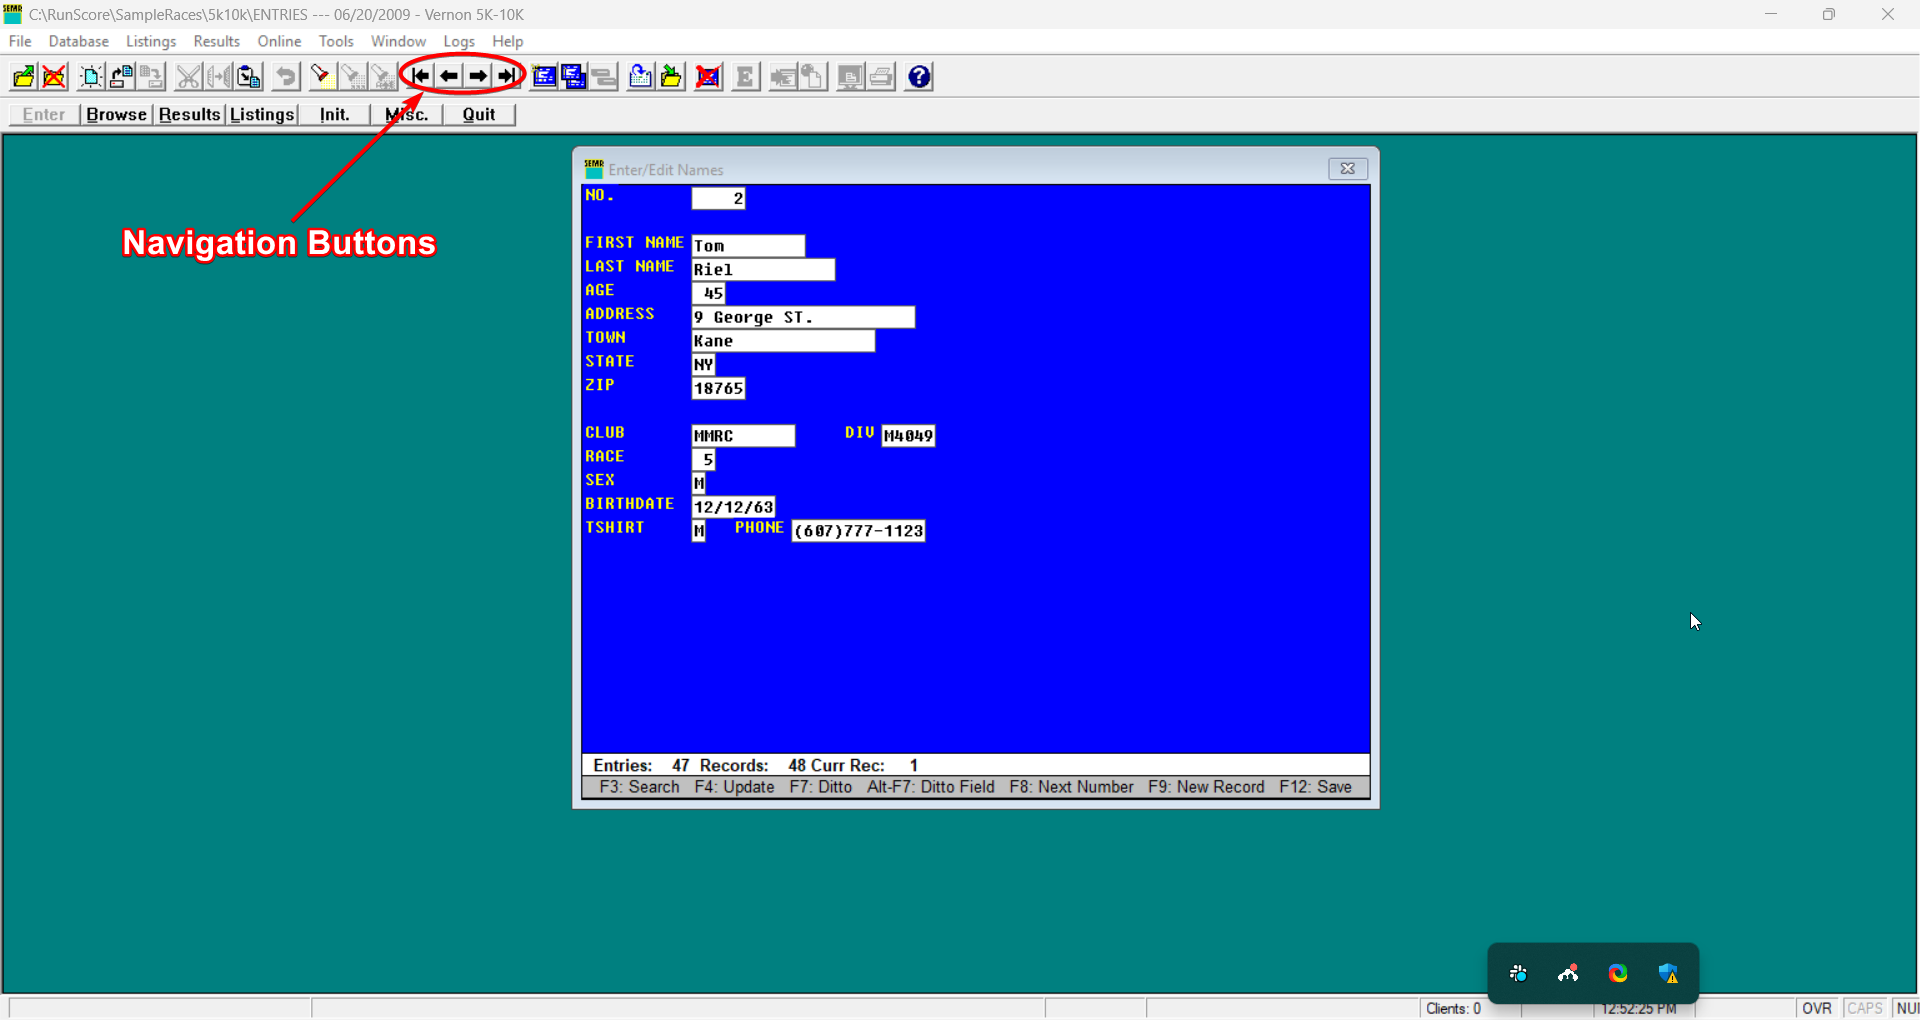
To open it, click the Enter button on the Master Menu.
When the screen first opens, it shows a blank form — this is ready for a new entry. To view existing records:
- Press
PageDownto load the first participant record - Use
PageUpandPageDownto step through records one by one - Press
Ctrl + Hometo jump directly to the first record - Press
Ctrl + Endto jump directly to the last record
You can also use the navigation arrows on the icon bar for the same movements:
| Arrow | Action |
|---|---|
|<- | First record |
<- | Previous record |
-> | Next record |
->| | Last record |
Press F1 at any time while a screen is open to jump directly to that screen's help page. This works from the Enter/Edit Name screen, Browse, Results — everywhere.
The Browse screen
The Browse screen gives you a spreadsheet-style view of many participant records at once — great for getting an overview of your entire field or quickly scanning for a specific name.
To open the Browse screen, click the Browse button on the Master Menu. See Browse Database for the full feature walkthrough — sorting, searching, inline editing, backups, and more.
Accessing listing files
RunScore uses listing files (.lst extension) to define how results reports are formatted and calculated. You'll work with these more as you advance, but it's worth knowing how to find them now.
- Click the Listings button on the Master Menu.
- A screen appears showing all
.lstfiles in your current race folder.
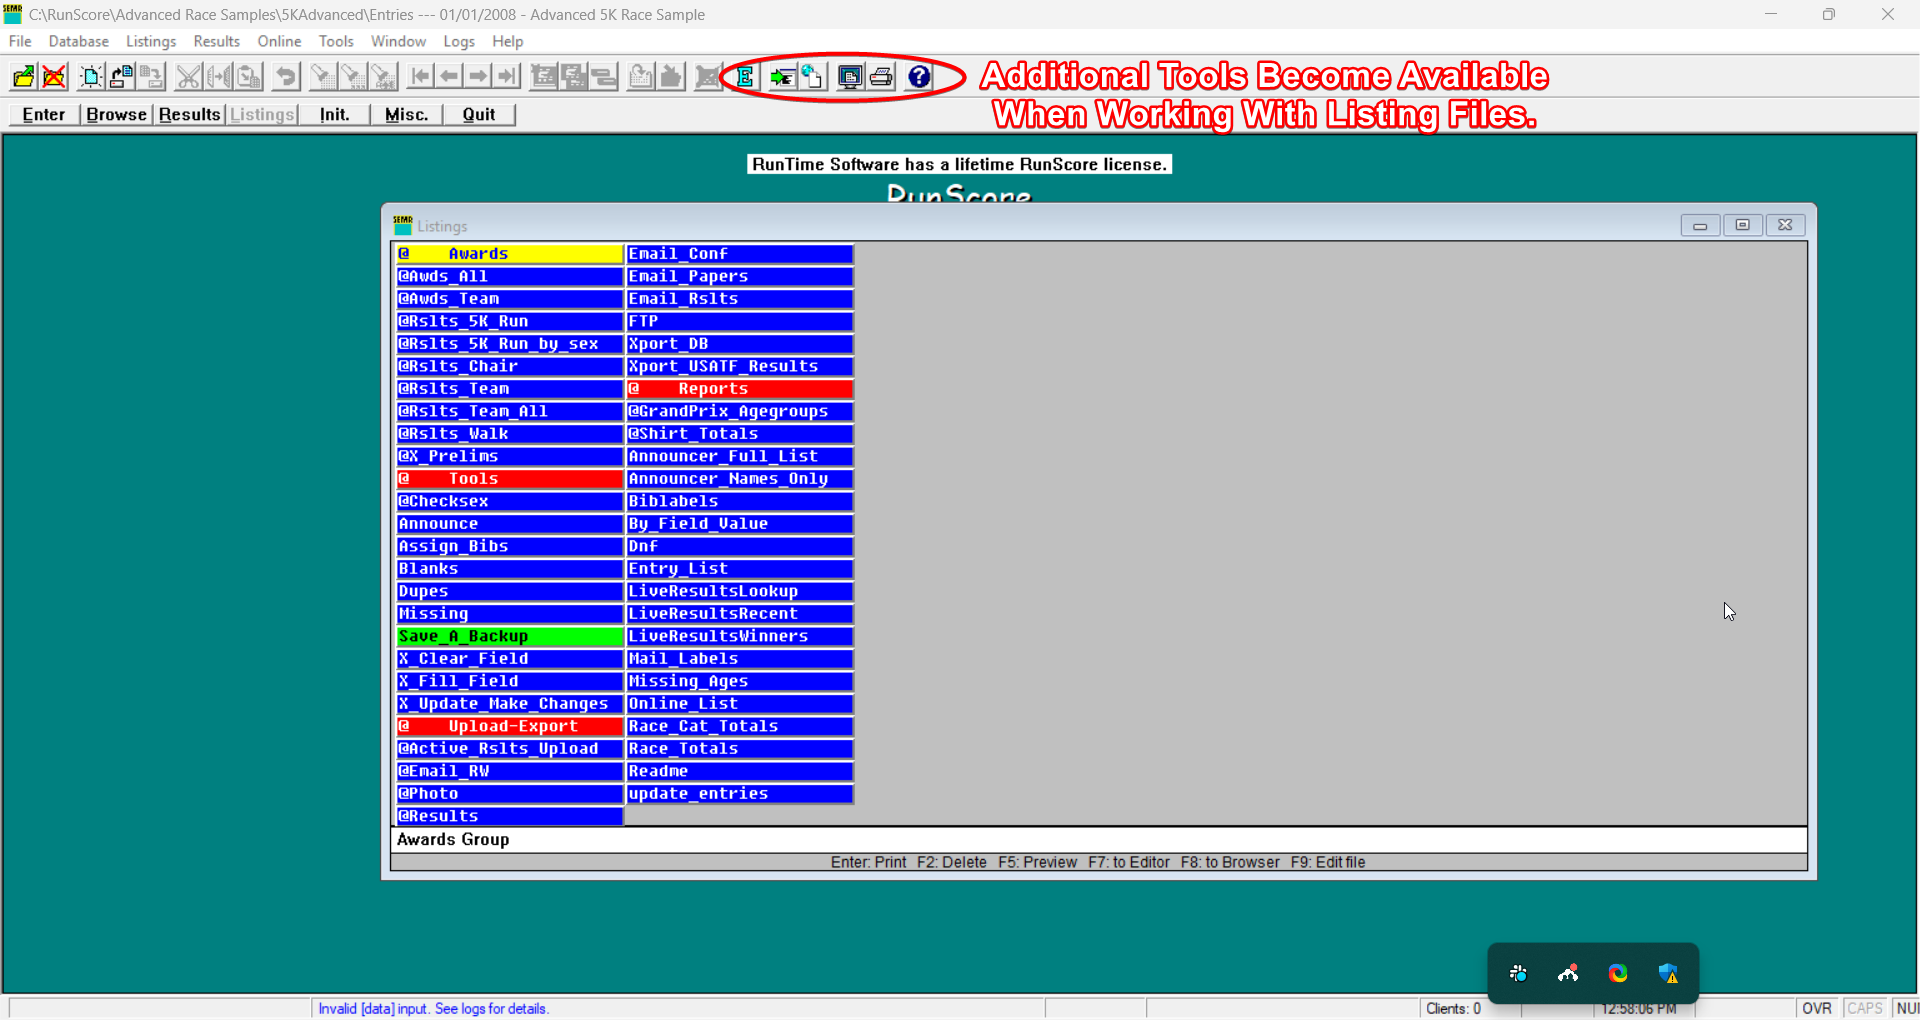
Notice that when the Listings screen is open, additional icons on the icon bar become active — these give you tools to run, edit, and manage your listing files.
The sample race folders include ready-to-run listing files. As you advance, you'll learn to create and customize your own in the Programming Primer section.
You've explored a sample race — now it's time to create your own. Head to Race Configuration to learn how to clone a race and customize its settings.