Setting Up Your Race: Configuration Essentials
Now that you know how to navigate RunScore and view a sample race, it's time to set up your own event. This page covers three core concepts: creating a new race by cloning an existing one, customizing it with the Entries.ini configuration file, and understanding how RunScore manages your scoring events.
Creating your first race: cloning a sample
The fastest way to create a new race is to copy an existing race folder (last year's race, or a sample under C:\RunScore\SampleRaces) and open the copy. That keeps subfolders such as the 5K sample's data\ chip lookup.
File → Save Race As is an alternative. Open the source race first, then save. It copies only top-level files — not subfolders — and switches RunScore to the copy. Copy any needed subfolders by hand.
Let's create a practice race called Training based on the sample 5K:
- If the 5K sample race isn't already open, open it: File → Open Race →
C:\RunScore\SampleRaces\5k\ENTRIES.FRM - From the menu bar, click File.
- Select Save Race as... from the dropdown.
- When prompted, type
Trainingas the new race folder name. - RunScore will suggest saving the new folder under
C:\RunScoreorC:\RunScore\Races— this default location is perfect. - Click OK to close race.
RunScore closes the sample race and opens your brand-new Training folder. Notice the top border immediately updates to reflect the new race name:
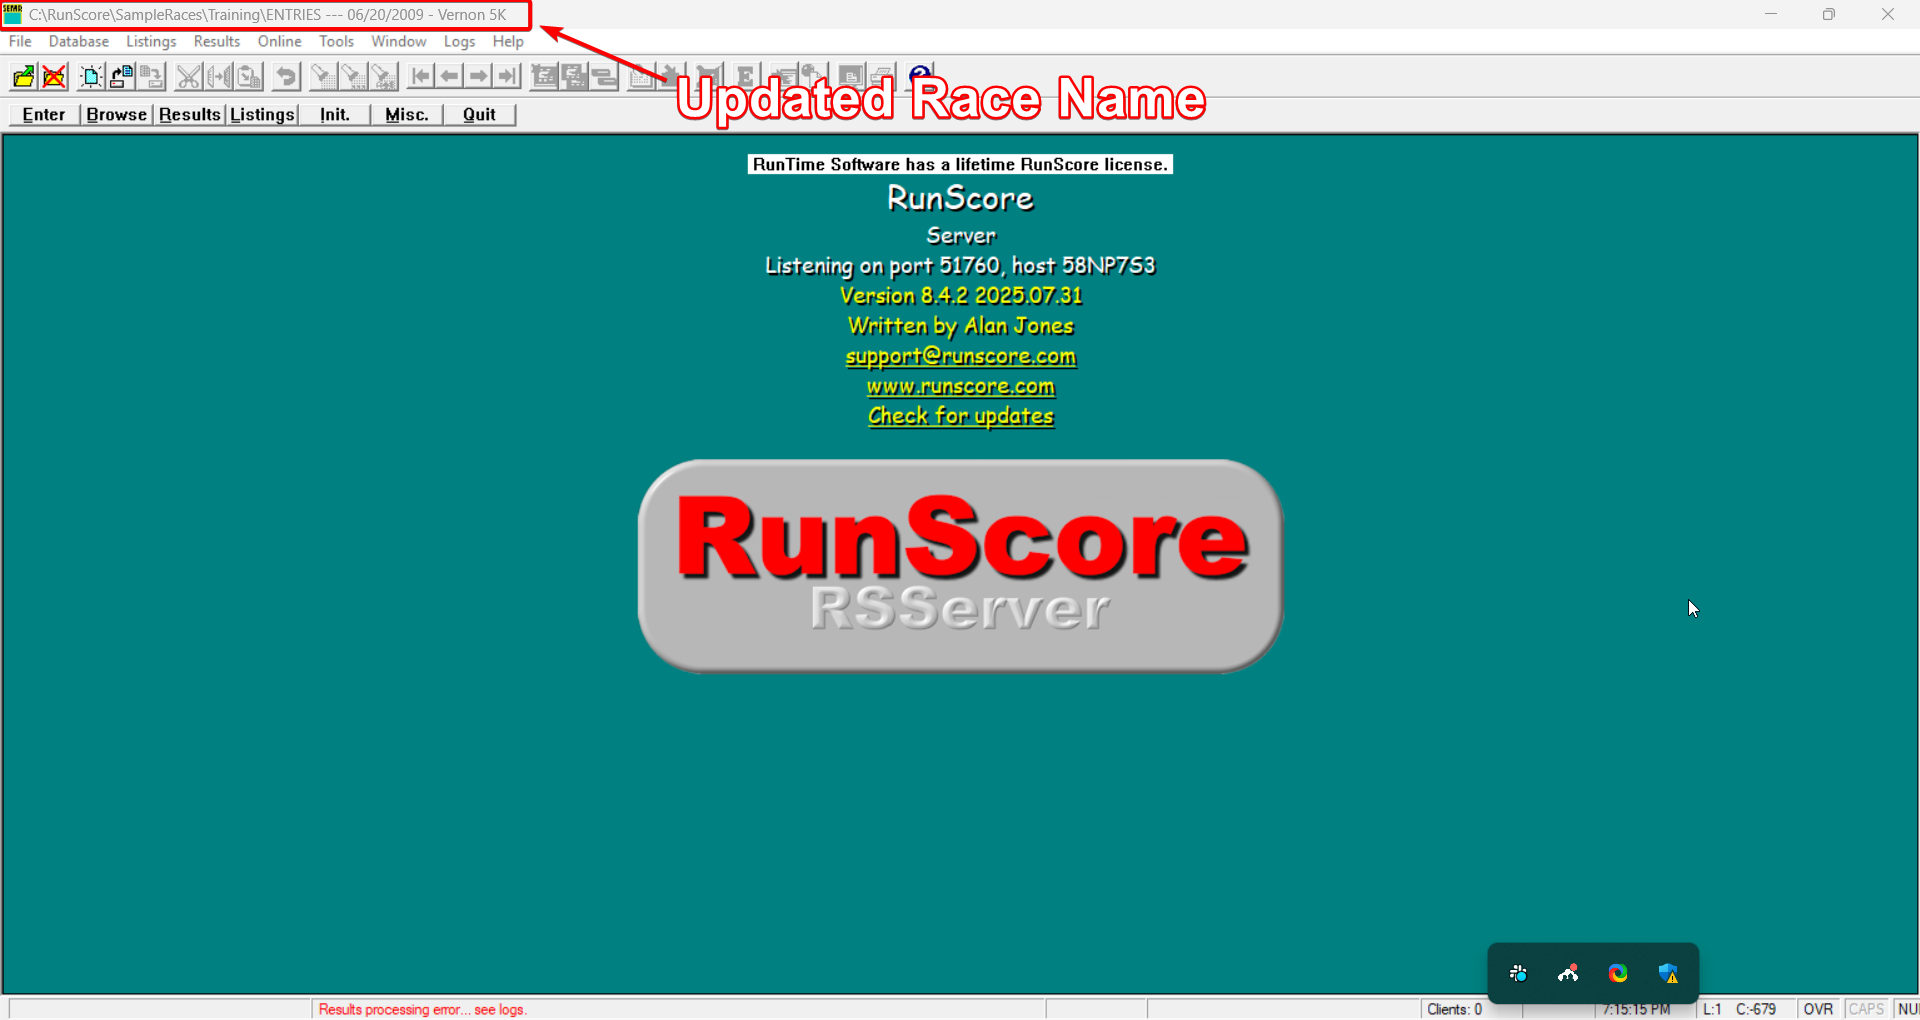 Notice the top border immediately updates to reflect the new race — something like:
C:\RunScore\training\Entries --- 06/20/2009 - Vernon 5K
You now have your own editable copy of a complete race setup, ready for you to experiment with and learn from. The original sample race remains untouched.
Rather than building races from scratch, experienced RunScore users almost always start by cloning a previous event that's similar in format. It saves considerable setup time.
Customizing your race: the Entries.ini file
Every race folder contains a file called Entries.ini — think of it as your race's control panel. This plain-text file defines essential details like your race name and date, as well as system-wide settings that control how RunScore processes and displays your data.
Some things you'll typically configure in Entries.ini:
- Race name, date, and location — displayed in reports and the top border
- Field definitions — which data fields appear in your participant database
- Division rules — how RunScore assigns age groups and gender categories
- Results display settings — colors, fonts, and layout preferences
- Custom variables — your own defined values for special race requirements
For your first events, simply update the race name, date, and location at the top of the file. The rest of the settings from your cloned race will carry over and work fine. You can learn more advanced configuration in the Entries.ini reference section.
Search fields: bib first
RunScore finds participants by their search fields, in the order they're set in the Design Screen:
- Bib number — usually labeled
NO.orBIB. It must be the first search field. - Chip ID — only for chip/tag systems that send a chip code. It must be the second search field.
- Extra chip fields — for example, a chip on each shoe. Put them right after the first chip field and set the count with
Chip fieldsinEntries.ini. See Multiple chip fields.
Systems that send the bib number don't need a chip field. See which ones in Chip/Bib Timing → Supported systems.
Defining your scoring events
Behind the scenes, RunScore tracks your race data through events — discrete categories of timing data, such as gun finish times, chip finish times, or intermediate splits. All your events for a race are stored in a file called Events.xml.
Viewing your current events
- Click the Results button on the Master Menu.
- A dropdown list appears showing all events defined in
Events.xml— for example, aTimeevent for gun times or aSelectevent for chip/select times. - Clicking an event name opens a dedicated Results Screen for that event, showing bib numbers and their associated times.
Editing or adding events
If you need to adjust which events are available — for example, to add a chip timing event or remove one that isn't needed — you can edit the list:
- Click the Misc. button on the Master Menu.
- Select Edit list of events from the options.
For chip/tag races, also set each event's type so repeat mat reads keep the right time. See Repeat reads on a mat.
Most road races use two events:
- Time — records raw gun times as each finisher crosses the line
- Select — records chip/select times that are later compared against gun times to determine official finish order
This two-event setup is the foundation of the race reduction process, where RunScore reconciles your timing data into a final, accurate results set.
With your race configured and events defined, it's time to enter your participants. Head to Participant Data.